Pages

Friday, February 10, 2012

Textile Artists using construction techniques

For chapter 12 of this module I've looked at work by textile artists that involve some of the construction techniques I've been studying - knitting, weaving, wrapping, etc

I've arranged the work on 3 A3 boards with a few comments on their techniques.


My 2 favourites have to be Adrienne Sloane and Nora Fok.  Adrienne I was lucky enough to meet in Australia when she came over from the States and taught a workshop for ATASDA in 2009 and gave a talk on her work the preceding evening.  I love her thought-provoking pieces in bold colours.  I learned how to manipulate shapes and try out some strange 'fibres' in my knitting first from her.

Nora Fok I first read about in 2001 just when I was really starting on the C&G path and was finding how exciting textiles could be.  Her 'knitting' just amazed me and I love the delicacy of her jewellery.
As if only to prove to myself how dexterous she must be to achieve these pieces, I had a go knitting with the nylon microfilament she often uses on 4 needles.  I had read in an article that her needles were about size 9 or 10 so that seemed achievable.  The photo below shows my 3rd or 4th attempt at knitting this fibre in the round to make an i-cord (of a sort).  It's about 20cm long so is by no means miniature but I still found it incredibly difficult to control and impossible to give smooth edges to the shape - even more in awe now!


There are many wonderful basket makers in Australia, eg Virginia Kaiser so I have included her on the next board along with Shuna Rendel from the UK who creates lovely sculptural pieces in similar materials.
Anne Jackson's quicky subject tapestries involve a double half-hitch knotting method that I'm in the process of trying and gives a lovely 3D quality to the work.   Jan Truman weaves copper and stainless steel wire into striking sculptures with glass and fabric, while Julie Kornblum from USA weaves colourful sculptures using fabric cords and recyclable materials.


On the subject of recycling, I love the work of Chakaia Booker involving recycled tyres and wood woven together, and Ryan Lytle from USA who has used recycled materials and wire woven together.
Michael Brennand-Wood always produces wonderfully colourful and detailed 3D works that combine wrapping and weaving of rigid materials into pieces with great animation and life.
Jessica Preston, not strictly a textile artist but more of a textile designer creates fabric work with an almost origami like intricacy of manipulation that I love.


Monday, February 6, 2012

Sketchbook pages "Looking into..."

Here are my sketchbook pages for Sian's Distant Stitch competition entitled "Looking into....".

Many of you know of my love of making handbags 'on the side' to my City and Guilds studies so I decided to "look into ....my basket of handbag bits" for this.  Here is a selection of those buckles, catches, feet, etc so that you know what I'm on about!


The sketchbook pages following are all A5size.


1 and 2 are graphite drawings on page washed with diluted procion dyes.

3. uses watercolour pencils and fine tipped white and black pens

 4. Drawing in chalk pastels on black.

 5. is a collage representation in printed newsprint.

 6. Rubbings in oil pastels over O- and D-rings then schematic shapes of clips and twistlocks cut out of page to reveal black page below.

 7. Page cut into strips from centre, folded back and woven to give a link to the original basket, and to allow the viewer to look inside at charcoal drawings and embossed aluminium cut shapes.

 8. Monoprinting in 3 layers to build up 'drawing' made from the back of page

9. Monoprinting in several colours on page over shape resists.  Resulting coloured resists glued offset to give shadow effect.

10. Partial drawings in oil pastels, page washed in diluted Procion dye solution, dye removed with thickened bleach drawings, free machining of repeating shapes in black thread.

Many thanks for the challenge, Sian. I tried to include as many different types of media as I could but I found (like Jen I think) that it made the selection of only 10 all the more difficult!


Wednesday, February 1, 2012

Spreading off the edge

In this exercise I moved away from the recent colour scheme (greens / reds) slightly by selecting small sections of a decorated paper I had from a recent workshop on printing with wax resists and watercolours.  The original paper was hence quite pale in colour and led me to extend the sections into more subtly coloured designs than before.

I selected 3 small sections (10cmx4cm).  The markings were in ochre, green and dark purple but that hasn't really come out in the small photos:


I placed each within an A4 page and extended the designs off the edge.

9.1

9.2

9.3
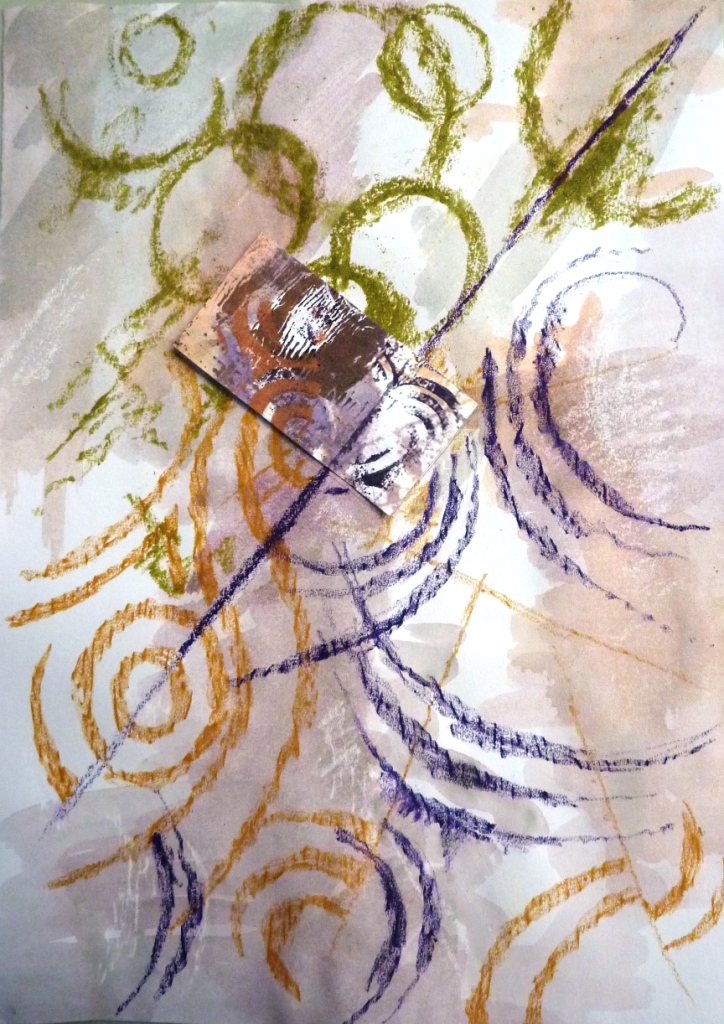
The three designs were each drawn in Markal paintsticks and water resistant oil pastels with watercolour washes on top.  The original sections had markings in olive green, ochre and purple so I kept with these colours.
I then took 2 of them (9.1 and 9.2) and placed them on A2 pages to extend the designs further:

9.4 (A2 page)
The A4 page of 9.1 was placed in the top left hand corner and extended to give 9.4.  I placed more small sections cut from the original decorated paper into 9.4 to add smaller detail on other areas of the A2 paper.

9.5 (A2 page)
9.2 was placed in the centre of an A2 page to produce 9.5, along with more small sections (middle and bottom) as in 9.4

I then looked at specific areas of interest in these pages, areas that contained part/all of the original section.
 
9.6

9.7

9.8

9.9
9.10
I first played around with the proportions of 9.6 as the curved lines appealed to me and suggested braids or cords.

9.11
 There was an interesting line of movement throughout the design that I could see developed as part of a larger hanging work. I created a tesselated form of the design using repeated and mirror images:

9.12
9.12 I thought that this would make a great fabric design, particularly an edging where laced cords might represent the curved rubbings.

9.13
 With folds this could be a folded book, or with hinges on a large scale a folding screen.

9.14
 This vessel reminded me of Jean Draper and Ken Jones' collaborative piece in PSG exhibition that Sian suggested looking at, particularly with some lacing cords around the walls of the vessel.

9.10


I decided to go back to another closeup sample, this time photo 9.10 with a circle pattern.  The enlarged sample was stretched horizontally and split into 3 suggesting a tryptic as below.


9.15
  The black background is A2 to give an idea of scale.

9.16
This is the photo stretched vertically and split into 3 vertically.  This could be one piece (approx 1m long) or designs for 3 separate cushions.

9.17
This last idea for a lampshade comes from the original section stretched horizontally and squashed vertically. 3 copies of this have been suspended above each other with circles joining them (here represented with paper cut-outs).  The colourings of these designs lend themselves to illumination I feel given the right fabric choice.

Wednesday, January 25, 2012

Textile translation

Fo my 100th post I've translated one of my "off the edge" designs into fabric.
I chose this one

and translated it (loosely) into this

8.24
 I actually started off looking at my monoprinted designs which appeared more translucent with the plan of using layered organzas and embroidered flounces, but the created edge felt too different from the original cotton fabric.  I opted for a heavier faced edging in the end.

For those interested I took some photos of the process I used to achieve this look.

8.25
 The original fabric was extended by applique onto a piece of pale yellow linen

8.26
 I created some areas of background circle decoration (that came from a couple of the other designs) but embellishing pink optim roving through from the reverse and free embroidering in circles from the front.

8.27
 The 'flower' shapes were added and attached using fine zigzag around the edges.  Stripes added using cabling from the underside in perle 5 thread.

8.28
 I extended the cabling stripes into the original fabric to integrate them a little more.

8.28 detail
 A close up of the embellished background.

8.29
 The shaped edge was faced with another piece of linen, and turned right side out.

8.30
 Ribbons of petals were added on top to give further depth to the textile and for this I used sheers and silks.  The edges were roll overlocked and also cable stitch embroidered.  I wanted the ribbons to be subtle and not obscure the flowers too much.

8.31
The ribbons are only attached in certain areas to allow them to curl naturally as they fall.


The finished edge is about 40cm wide by 30cm deep.

Saturday, January 21, 2012

Edging along

I've been looking at creating samples of decorative edges using different techniques - can't promise innovation but hopefully not boredom.  These samples are subdivided into technique categories but as usual there will be a bit of overlap.  Once I started on this I realised that, aside from samples getting easily lost, they needed to be presented together in some format so I have 'bound' them staggered in a kind of cloth reference book of edges.  I'll post photos of them together later but for now each sample is generally photographed separately.

Turned Edges

8.6
8.6   The edge material has been pin tucked on the diagonal then turned up and 3 channels filled with braided cord.  The loose ends have been knotted.


8.7
8.7  Wide turn-up created, numerous staggered buttonholes made then felted cords run through them.


8.8
8.8  Diamond shapes sewn in satin stitch, interior cut out then fabric turned up to reveal interesting gaps.  A braided cord runs through this channel.

8.9
8.9  Cut out strip of decorated felt attached to fabric edge, turned up and held in place with a gold cord passed through tabs and looped around the cut strip.  I've added the scissors into the photo to show where the turn-up is.

Bound edges

These 3 samples are shown on the same photo 8.10 with photo 8.11 showing the reverse side of the bound edge matching the front side.
8.10

8.11
8.12
In the bottom sample, the raw edge is hemmed with decorative fly stitch and turned edge bound with felt braids passed through buttonholes. 
In the middle the raw edge is wrapped in a freemachine sewn grid (8.12), held in place with braid tabs. 
In the top edge the raw edge was wrapped in chiffon, pattern sewn by free machine (resembling some of the petal design features on the last post) then cut away by soldering on both sides.


Faced edges
8.13
8.13  A shaped edge was created in the black fabric using a turned seam then wet felted leaves free embroidered and added on top.


8.14

8.15

8.16
 8.14  These 'drips' came from drawings/prints of large folded leaves in my sketchbook from Module 1 (shown in 8.16).  Thin fabric shapes and thick felt shapes were caught in the lower seam of the facing before turning right side out.  Another chiffon version of the shape was satin edged and caught in a second fold above that to overlap.


Frayed edges
8.15
8.15  This sample has a black cotton backing with frayed edge with pink frayed muslin gathered and folded to resemble the fluted tops to the "orchid" flowers of the original inspiring fabric.  The olive silk dupion was frayed to exploit the 'shot' nature of the fabric and reveal a stripe pattern (as in the original).  Cabling with green perle emphasised the stripes


8.16
8.16  This sample similarly looks to the stripes for inspiration and uses frayed black hessian, frayed dyed muslin threaded and knotted through the hessian, and paper beads hanging on the 'tassels' created from the hessian.


Ruffles
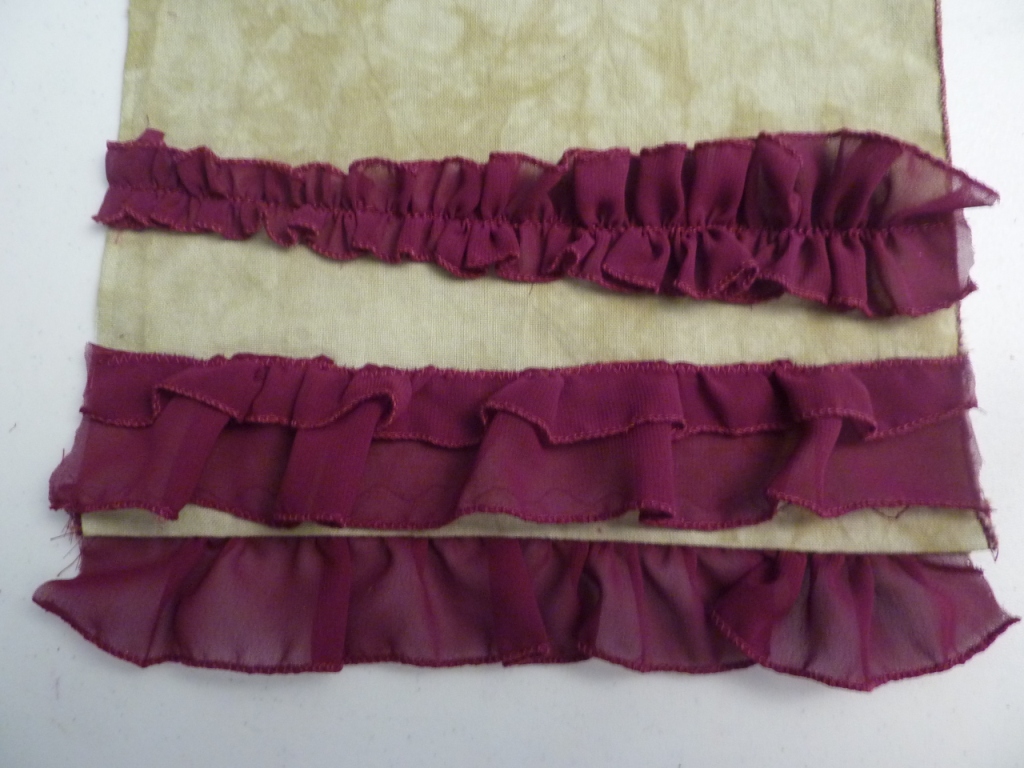
Various ruffles were made from bias strips of poly chiffon.  I overlocked the edges to give some firmness.

8.17
 8.17  Bottom - simple even ruffle gathered along one side and inserted into edge facing.  Middle - wider ruffle gather off centre line, folded and stitched down along fold to give a tiered ruffle. Top - ruffle increasing in size l to r.

Flounces
Flounces are cut from circular shapes to give fullness without gathering at the sewn edge.

8.18
8.18  These flounces were cut from 3/4 of circles of cotton with internal circumference approx. 22cm, external circum 44cm.  The flounces differed only in the position of the internal circle for cutting (see diagram beside each flounce).  The length of the internal circle circumference and therefore the length of the seam was the same in each case.  The bottom flounce was set into the facing hem while the others were each sewn into a horizontal pleat in the green fabric.


8.19

8.19  Flounce in chiffon made from 2 complete circles set into a vertical seam.  I think this might be useful in my later interpretation of one of the fabric pattern designs for the orchid-like flowers.

Stitched edges
 
8.20

detail
8.20   This edge was created on water soluble fabric using an automatic stitch pattern repeatedly to buildup the lace then a perle 8 thread couched over lace and fabric.
 
8.21
 8.21  Leaf shapes free machined towards edge of chiffon. Edge of shapes and some internal areas removed with soldering iron.  Lace leaves sewn by free machining, attached to this edge using watersoluble fabric.

8.22
 8.22  To create a folded lace edge, free machining and cabling done in spirals between two edges of chiffon over water soluble fabric.  Once dissolved away, the new lace was folded to create the new edge (8.23).

8.23