Many moons ago I put up some of my ideas for the embroidered piece at the end of Module 1 so I thought I'd better show how that was progressing. Since I first worked on it I'm afraid I got seduced by Module 2 and the piece kind of migrated towards the UFO pile. However 5 sales and 2 workshops later I thought I'd better get back to some real work.
I had the idea of taking the patterns created from monoprints and creating a garment, a dress concentrating on a lace effect of overlaying shapes.

Taking into account some of Sian's comments I attempted to create a visual impression of layers but making only one piece of embroidered material. I tried to keep the overall fabric light and translucent so the embroidered elements could show through.
I liked the coral / pink and olive green combination so I started by dyeing light muslin a dusky pink/coral colour (excuse the bad photo). I machined random pintucks in the fabric to create a bit of texture and replicate the original monoprint background markings.
photo 1

I then added dyed pieces of scrim and lengths of overlocked threads in various tones.
photo 2.

My olive green chiffon was overlaid on this, then covered with water-soluble plastic, ready for sewing my lacework design. I decided to change the early design to one involving one of my shapes selected in chapter 12. The lacework pattern below was created, drawn onto the plastic and free machined using cotton threads and a hoop.
photo 3.
Once the water soluble was removed, lacework was created by soldering iron.
photo 4
From 2 large pieces this fabric I was able to make this dress:
photo 5.

The bottom of the dress is shown below in detail, where I allowed the lacework to fall below the line of the muslin fabric.
photo 6.
The back of the dress is shown below. The bodice was made from the same dyed muslin with bias pleating of chiffon on top.
photo 7.

The dress is not complete yet - the bodice (below) still has a raw upper edge and the embellishment forming the one shoulder strap is only pinned here. But essentially I am planning to use individual lace motifs (smaller version of the lacework shape used in the skirt) to sweep over the shoulder, across the bodice (following the chiffon pleats) and a little down the opposite side. I've made fabric tendrils/vines to follow this shape and link the motifs.
photo 8.


 And fortunately I didn't get stopped at the airport on the way back this time with my bags of magnets!
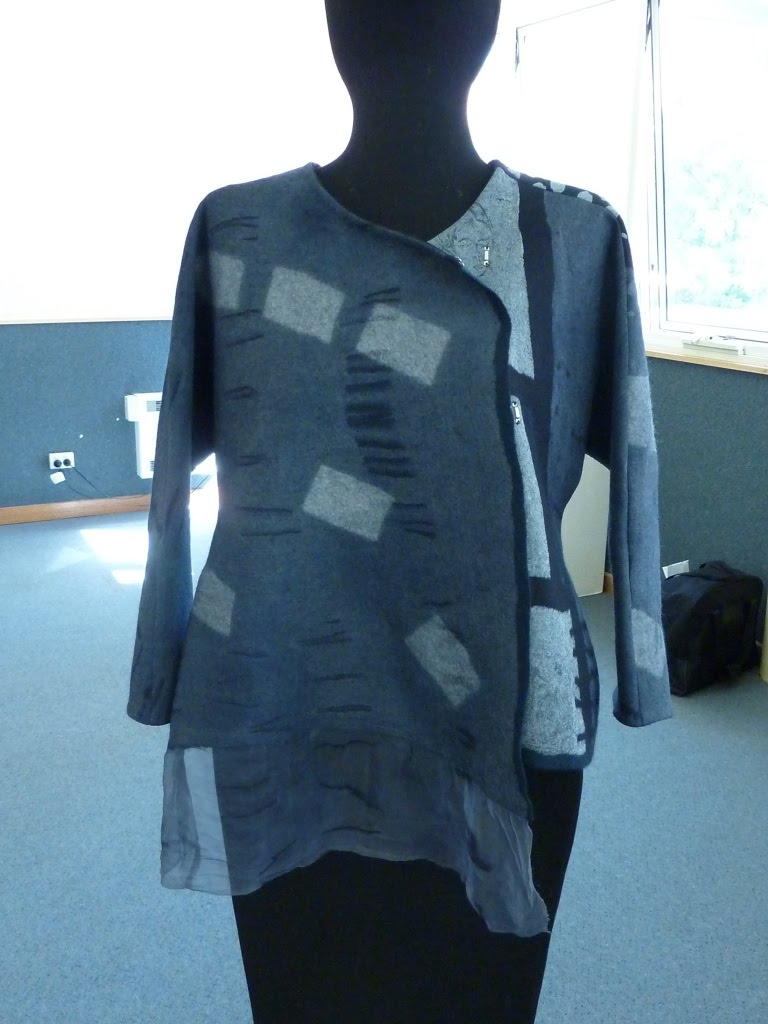


 and many hours later the finished tunic (front and back). Spot my recurring motif from my research, and my dress!
 The motifs were inlaid, or appeared through cutaways or felted on top, but in the end you couldn't really tell which method had been used as it was pretty smooth.


