Pages

Showing posts with label module 4. Show all posts

Tuesday, December 17, 2013

Clearing the decks

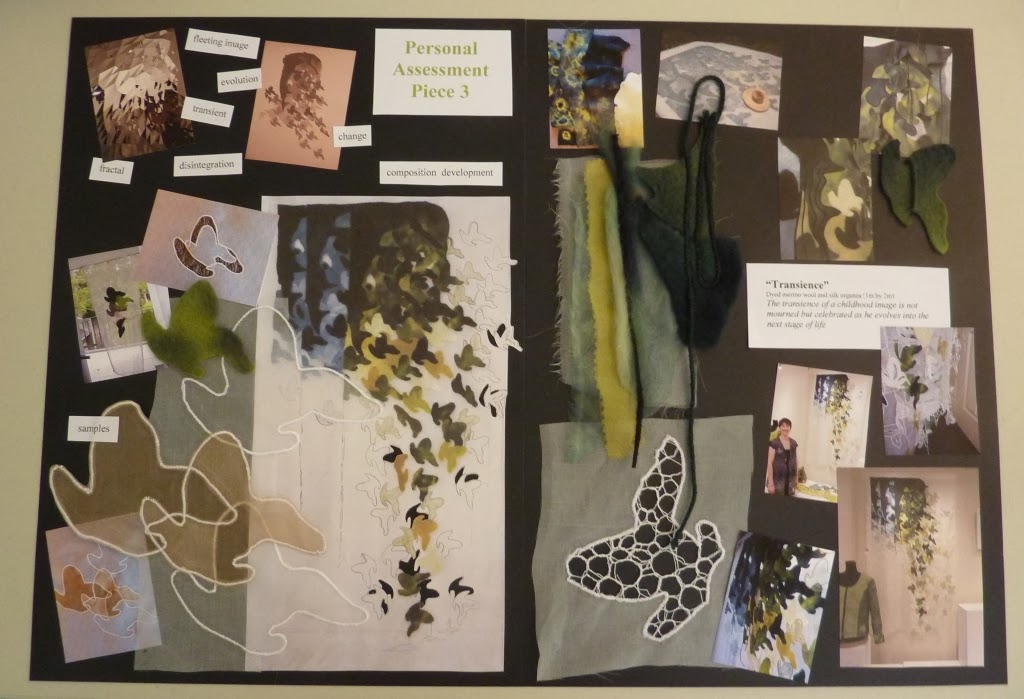
Gave myself an early Christmas present this week - a clean floor around my workspace - finally organising and presenting my last Module's work in folder format.  It also included finishing the paperwork outstanding for Module 4 and preparing a design board (two A3 sheets) for my PAP3 piece.


Timing involved in PAP3:

Research and design work for this piece started in February 2013 and was completed end April 2013 (covering approximately 35 hours)
Sampling and embroidery work started March 2013 and completed end August 2013 (covering 85 hours)

Costing involved in this PAP:

Fabrics
3m silk organza
150g merino wool roving
1m white merino prefelt
4ply wool for cording
80
approx 50g landscape dye
5
approx 3 reels sewing thread
10
watersoluble stabiliser for lacework
8
vinegar as mordant for acid dyeing
2
Total $105 AU

Self Evaluation of PAP3:

I enjoyed researching and developing this piece.  It referenced the faces/portrait design work of module 3, the motif design development of module 4 and the felt making skills develped in module 4, while having connection through the motif origin with my personal research theme overall - floral, vegetation.
It allowed me to explore my liking for lace in a felted environment and the result was well received when exhibited and gave pause for thought.

The design process again showed me the benefit of stepping back and rethinking a composition, creating more of the unexpected rather than the somewhat duller expected view.  The motif work in this case, demonstrated its use in creating a cohesive exhibition of pieces, a technique I'm sure I will reuse in the future.

Tuesday, June 25, 2013

Contemporary Textile artists - chapter 13

To complete the work for this Module 4 I have been studying textile artists with a propensity for working in felting, creating sculptural forms and using Kantha stitching in their work.

I make no apologies for selecting Australian artists here as I tend to have more opportunity to study their work at first hand, and interview one or other at a later stage for further research in Module 6.


Sunday, June 23, 2013

PAP3 developments

Moving on from my samples of motifs on organza and rethought design in previous postings I sketched a working paper design in the colours I wanted to use.

12.7 design
The paper design has additional shapes to the felt motifs which will be in dyed organza then outlined motifs in colour and in white - a sort of progression into translucency, bearing in mind that I wish to hang this freely in a window space.  The very white sections on the drawing represent cut areas in the organza.

So here is the laying out of the design in prefelted shapes.  Because of the size (about 3m x 1.5m) I did this on the floor then struggled with getting it to the felting table in one piece.  Note to self: get a bigger table.

12.8 laying out felting design
The felting in process a section at a time:

12.9 nunofelting process
and the nunofelted organza before stitching anything:
12.10 Nunofelted hanging on organza
I have now worked into this organza adding the dyed organza motifs, embroidered shapes and cutwork.

12.11
You'll have to excuse the red curtains above but I wanted to photograph in an open window and the open patio doorway on a rather wet wintry afternoon had to suffice.  You'll see more detail in the next photos:

12.12

12.13
The top and side edges have been simply overlocked to finish and a top pocket formed to take a rod.
The piece is not completed as the bottom edge has not been thought through properly - but I will talk through a further few ideas with Sian when I bring it to Farncombe in July.

One thing I am particularly pleased with is how the hanging moved in the breeze, seemed to go with the movement of the design, and that despite the felting thickness the hanging remains delicate.

12.14

Thursday, May 9, 2013

PAP3 samples

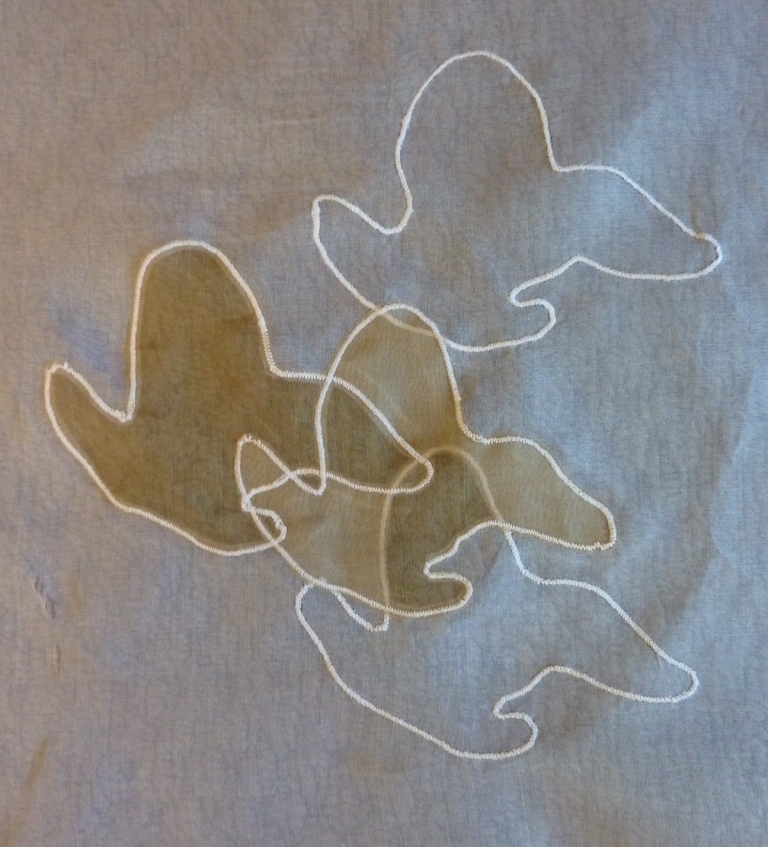
I've been trying out a few ideas of cutwork and lace for the background and edging of my PAP3 hanging.  These are sewn on silk organza and hand cut:

12.1
 It's not too clear from 12.1 but sections of the shapes have been cut away to give a shadow effect and colour shading
12.2
In 12.2 the top shape fabric was completely removed once the outline sewn then restabilised in a hoop and lace stitched on watersoluble fabric.  In the bottom shape only sections of the fabric were removed - a sort of broderie anglaise look.

12.3
In 12.3 I was looking at creating a staggered shape hanging in the gap, which I like and fits with my 'falling' shapes in the design.

I've also worked on some hand-dyed prefelt for the hanging, using an electric urn.

12.4
 I dyed some white prefelt a lichen / lime green using an ombre technique to get colour gradation. The wool is gradually pulled out of the pot over a wood block, then covered and steamed to set. You can see a sample of that in 12.5 below on the far right of the photo.  Then most of this prefelt was overdyed again using a dark blue acid dye again by the ombre technique (2nd from right in photo below) and directly in the pot having been shibori tied to retain areas of green (left of photo below)

12.5 dyed prefelt
12.6
A selection of tonal felts were similarly created from white using black acid dye (photo 12.6) to use in the black/white monotonal part of the design.  The colour variation within each piece was not as great as I had imagined (too much liquid in the pot so the dye dispersed and dyed fairly evenly) so I'll perhaps add wisps of wool roving to break up the colour or hand stitch after.


Sunday, February 3, 2013

Having fun with FELT - chapters 10,11

There were various aims of this section such as
  • working in either wet and/or dry needle felt process using inspiration from colour and design studies in previous chapters,
  • incorporating "slips"
  • utilising functional and/ or decorative stitching
  • developing a personal response to designs and challenging youself
Ok, maybe the last point was more my view than Sian's, since up to now I've done a lot of felting mainly in a 'conventional way' as I would see it.  So I took what I knew, and could do already and tried to play a bit more while interpreting my designs:
The first sample was based on this tonal design from chapter 9 (and shown in 10.1)
10.1
I decided to prepare a few different nuno prefelts from which I could cut the slips and then a background prefelt made tonally different by the way I laid out the tops.  
10.2
The slips prefelts were made by nunofelting organza printed with magnolia photos onto both pink or white wool to get 2 different looks.
Slips were cut out of each and fully felted onto background along with slips cut from dark pink prefelts.  I did some surface machine stitching using wool thread around some of the slips to give dimension and depth (10.3).
10.3
10.4 close up
The digital print on the slips is a little easier to see in the close up.

The next sample is based loosely on this monoprint from chapter 3 in 10.5:
10.5
I wanted this to be loosely layered so tore 3 dyed scrims and felted wool tops sparsely into them, giving holes and gathers in places.
10.6
These nunofelts were cut up in strips and woven / threaded through each other and more strands of wool top, then felted on to a white prefelt backing.  With only a little free wool between the scrims, certain areas were left loose from the backing.  Finally some free machining in wool thread was done on top.
10.7
10.8
A third sample was based on a similar monoprint:
10.9
I wanted to give this a different look whilst reflecting the layers of colour in the print, so began by making a prefelted sample of scrim nunofelt on purple tops.  Once dried I free machined in yellow then tied ceramic beans into the nunofelt and felted it fully by hand.
10.10
 Left to dry completely, untied and laid on to a pink felt background.  The tops of the felt bubbles were cut off to reveal both the purple edging of the cut bubbles and the pink layer beneath, then handstitched in white and pink running stitch to attach the layers together.  Finally yellow linen thread was threaded through the running stitches on the surface to reflect design print pattern (10.11)
10.11
10.12
One of my monoprints on black paper was used as a background in chapter 5 for fabric slips:
10.13
and this background was also the inspiration for a felt sample here:
10.14
The monoprinted lines suggested broken shards to me so I reconstructed the felt piece from a collection of broken / cut pieces.  Initially I digitally printed 2 similar monoprinted designs on scrim through the computer printer.  These were distressed/ threads pulled and prefelted on back wool tops. Once dry, the prefelts were cut up and rearranged.  Overlapping the staggered pieces allowed me to 'stick' them together by dry felting from the back and also create the scribbling back lines in so doing.  Couched pink and yellow threads on top further connected the pieces.
10.15
The gaps and the overlapping between the pieces are clearer in the detail of 10.15.

This sample became more 3-dimensional, here hanging on my display board:
10.16
Both background felt and felt for the slips were made 2-sided.  The background at prefelt stage had 2 lime green shapes set in and felted, then pin tucks sewn, and cut open to reveal the coloured felt from the other side.  The outlines of 2 shapes were handstitched in yellow.
10.17
10.18
The felted slips were fully felted, red on one side and yellow on the other.  Cut out they were handstitched in pink blanket stitch, and attached to the background in a twist using french knots.
10.19
10.20
I do like the way that both colours can be seen from different angles.

I also meant to felt a 'proper' 3D version of my slip ie a vessel, using resists but that will come in a later post once I decide on the scale.  I think this post is quite long enough for the moment.

Tuesday, January 29, 2013

Those 3D shapes of chapter 9

Section C of this chapter called for the creation of 3D designs using repetitive 2D shapes, including manipulated and graded versions of the shape.  This reminded me of work we did at Urchfont in 2009 during summer school with Janet Edmonds and I chose to look at that work again in the context of this chapter's requirements.

9.26
At the time I chose a positive shape that was based loosely on a cross-section of gumnuts (part of diploma theme) - the cardboard shape at the bottom of the photo.  I now realise that this particular shape was a bit too circular and probably lacked sufficient asymmetry but all experience and I made many....many.....

9.27
 (did I say many?) copies, joined them together with fishing line and spacer cut straws creating a flexible form. The undulations were quite subtle but I found that lovely shadow effects suggesting movement were formed in my photographs.
9.28
9.29
Parts of the negative shape in repetition gave interesting spirals with tonal variation in the light.
9.30
With these experiments in mind, I looked at arranging my slip shapes into spirals -

9.31
This was a bit of a 'wow' moment when I interlocked them all and found layers appearing.  The slip shape on the left is that found in 3.24 and on the right photographed in 3.25 of a previous post here.
I prepared sheets of card printed with one of my background colour transitions on the front and painted on the back in a dark magenta to allow for 2-sided shapes to be cut out.  I used the same shape as on the left in 3.31 and interlocked them in a similar fashion.
9.32
Interesting overall shape but the individual shapes are too similarly coloured to see the detail created.  I cut out a lot more and strung them together at one point with beads in between each shape to give a little separation (9.33 and 9.34)

9.33
9.34
Then strung them at an additional point - look like little birds in flight now, like the profile of this one.
9.35
When allowed to fall open like a book of pages, the contrasting side of the shapes can be seen.  But this wasn't really exploiting the 2-sided nature of the shapes.

9.36
So I then unstrung the shapes and arranged them utilising folds to display both contrasting sides -

9.37

9.38

9.39

9.40
Lastly an arrangement overlapping the slips as a border, cuff, neckline design? - this way or resting on the curves with 'spikes' upwards?
9.41
Now, how to keep that dimension in felt....