Pages

Friday, January 6, 2012

The rest of the braids

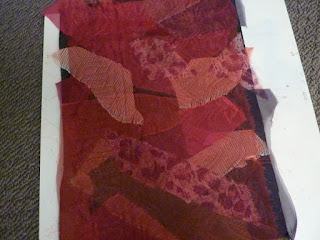
I had played around with interweaving cut paper braids in chapter 3 and now wanted to do this in fabric form.  I didn't have a computerized machine which allowed me to automatically stitch patterns to a reasonable scale so I cut my own from Kunin felt.  A bit boring in black, I collaged fragments of synthetic organza on top of the felt using bondaweb free machined the braid outlines copying somewhat the previous paper braids I'd used.  You can just see the stitching outlines in the photo.

5.6.1

I then cut out the braids using a soldering iron along with some hollow shapes for good measure.  Yes, I know, those gumnuts again!

5.6.2

I started to play around with these, interweaving them to give some interesting braids:

5.6.3

5.6.4

Mixing in some of the other stitched braids

5.6.5

5.6.6
Below are some of the braids presented on some of the stencilled and stamped backgrounds that I previously prepared.  I've tried to go with repeating shapes and patterns as well as colour similarities.

5.7

5.8

5.9

5.10

5.11

Thursday, January 5, 2012

Stitched Braids

Chapter 5 called for a variety of braids to be made using different methods.  I tried to keep to the guideline sections but some examples overlap in techniques and by the end I've definitely combined things as I see fit.
The samples are presented over 2 postings since there are 'quite a few'.
They tend to be green and red hues as this was my research focus in Module 1 for trees and vegetation.

5.1 Stitched Braids

5.1 Pattern stitched braids

These are fairly simple lengths mostly using felt strips, some of my own handmade ones, with machine stitched patterns.
From L to R, 1 is stitching of knitting tape, 2 3 4 and 7 stitching on felt trapping fragments of organza, 5 6 stitching on felt and overlocked organza strip, 8 trapped organza and dyed scrim, 9 trapped squares of textured painted felt.

5.2 Wrapped braids

5.2 wrapped braids

From top to bottom:
1 is a 3strand wrapped braid, 2 is plaited around felt then cetrally stitched, 3 4 wrapped with organza and silk then stitched, 5 6 and 7 wrapped with knitting wools, 8 wrapped with scrim stips, 9 organza and tape wrappings in opposing directions, 10 organza couched with gold fibre then wrapped around felt, 11 overlocked organza strip wrapped around machined cord then stitched.

5.3 Stitched Braid Threads

5.3 Stitched cord braids

For this section I prepared machine cords from stuffed tubular knitting cotton hand dyed.
From L to R, 1 has three cords stitched together, 2 has four cords together with another couched on top, 3 has two sets of cord groupings with wavy gold cabling then joined together with a further cord down centre, 4 has seven cords joined with metallic cabling, 5 like 4 except that the central cords have been plaited before joining to others.  The 7th sample had brass beads incorporated into the last cord.

5.4 Wrapped frame braids

5.4 wrapped frame braids

For these I made a frame from wire folder inserts that could be separated to remove the braid.  The braids are all about 2cm wide.
From L to R, 1 wrapped organza and wool (then cut) stitched with gold cabling.
2 wrapped scrim and wool with central cord couched.
3 wrapped fibres with central machine stitching over ribbon.
4 wrapped organzas over central cords then couched fibre added.

5.5 Water-soluble braids

5.5 water soluble braids

Some of these samples had less of the lacy look and more structure as I used heavier machined cords rather than threads on Solvy.
From L to R, I think most of these are self explanatory but in case they are not obvious, 4 uses cut sections of stitched felt braid, 5 uses circles of felt, 6 uses squares of organza, and the green 'strapwork' design in 7 was made by laying perle in this pattern over stitcky Aquasol then free couching over it and gold fibres to retain design.
Braid Stencils

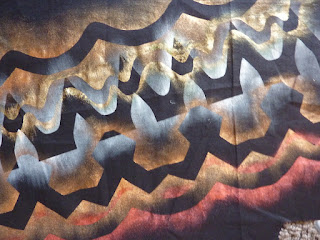
I decorated some dark fabric with stencilled braid designs for use later in the module as backgrounds.  The freezer paper stencils were cut to resemble the coloured paper cut braids in chapter 3.


I used Permaset fabric printing ink and Lumiere paints to colour the fabric (linen, and cotton homespun and voile)

Saturday, December 24, 2011

Where's a paper shredder when you need one?

Chapter 3 called for an examination of woven structures using paper strips.  I remember Anne writing that she had used her paper shreddings for this...but I didn't unfortunately possess such a useful tool so spent a 'while' cutting strips before I could start.
I got quite into the weaving process and then, of course, wanted to use them all up once I'd taken the time to cut them. Some looked too weird for display!  I've arranged some of the more successful ones below in 3.1

3.1
3.1 The top row shows closed woven structures using mostly 4 different coloured strips.
The bottom row shows open woven structures, trying to emulate the embroidered strapwork from my research in Chapter 1.

3.2
 3.2 Strips of white paper were folded concertina-like fashion then a pattern cut to created a repetitive patterned band (like making lines of snowflakes). 
The third white pattern is a linking of 2 bands woven together although that is not really obvious from the photo.
I cut some bands in coloured paper to make the woven links more obvious.  I particularly liked the line of little men that appeared in the negative spaces of the first coloured weaving.


3.3
 3.3 shows weavings using strips and 'hollow shapes'.
The top one and the last (bottom right) use shapes loosely found in the strapwork of Holbein's paintings.  The second and third patterns use a hollow shape of a gumnut (in 2 sizes) that I worked on in my A5 sketchbook of Module 1.  The shapes seem to make an interesting looped motif in the third design that looks similar to looped cording in strapwork.

Thursday, December 22, 2011

Braid printing and preparation

I made samples of the stitches found in Tudor strapwork embroidery on a 'large scale' so that they might be used as printing blocks in their own right for the next chapter.
2.1

2.1 From left to right the samples are: plaited braid stitch and braid stitch using 6mm leather cording on a grid from a plastic fruit box, then plaited braid stitch, braid stitch and ladder stitch using blind cord on 7hpi plastic canvas.
The largest 'block' is about 5cm by 14cm.

I used the blocks above on both paper and fabric using different coloured lumiere paints to create backgrounds for later.
2.2
2.2 from top left clockwise:
large plaited braid on black hessian, small braid stitch on cotton, large plaited braid stitch on cotton, small plaited on cotton.

2.3

2.3 I practised making some braids and knotted cords using felt cords I'd made previously.
The samples in the photo show the following: chain sinnet (or monkey chain), a single braid, a 4-stranded plaited braid, snake cord, square knotted braid, a 4-stranded striped braid, a chinese knot, and a 6-stranded chevron braid.
I owned a few books on celtic and chinese knots already for source material but found a few more on the web eg www.animatedknots.com and www.charles.hamel.free.fr/knots-and-cordages

As a bit of an aside, the snake cord is one that I do quite often in miniature for loops and closures on bags.

 I didn't include the Chinese ball knot in these samples as I felt it was too 3-dimensional for strapwork inclusion but it's one knot I use a lot - for tidying up the end of cords on shoulder bags more attractively than an ordinary overhand knot and a bit different from a bead.

It's amazing how many people notice it and ask how it's done.