Pages

Saturday, December 24, 2011

Where's a paper shredder when you need one?

Chapter 3 called for an examination of woven structures using paper strips.  I remember Anne writing that she had used her paper shreddings for this...but I didn't unfortunately possess such a useful tool so spent a 'while' cutting strips before I could start.
I got quite into the weaving process and then, of course, wanted to use them all up once I'd taken the time to cut them. Some looked too weird for display!  I've arranged some of the more successful ones below in 3.1

3.1
3.1 The top row shows closed woven structures using mostly 4 different coloured strips.
The bottom row shows open woven structures, trying to emulate the embroidered strapwork from my research in Chapter 1.

3.2
 3.2 Strips of white paper were folded concertina-like fashion then a pattern cut to created a repetitive patterned band (like making lines of snowflakes). 
The third white pattern is a linking of 2 bands woven together although that is not really obvious from the photo.
I cut some bands in coloured paper to make the woven links more obvious.  I particularly liked the line of little men that appeared in the negative spaces of the first coloured weaving.


3.3
 3.3 shows weavings using strips and 'hollow shapes'.
The top one and the last (bottom right) use shapes loosely found in the strapwork of Holbein's paintings.  The second and third patterns use a hollow shape of a gumnut (in 2 sizes) that I worked on in my A5 sketchbook of Module 1.  The shapes seem to make an interesting looped motif in the third design that looks similar to looped cording in strapwork.

Thursday, December 22, 2011

Braid printing and preparation

I made samples of the stitches found in Tudor strapwork embroidery on a 'large scale' so that they might be used as printing blocks in their own right for the next chapter.
2.1

2.1 From left to right the samples are: plaited braid stitch and braid stitch using 6mm leather cording on a grid from a plastic fruit box, then plaited braid stitch, braid stitch and ladder stitch using blind cord on 7hpi plastic canvas.
The largest 'block' is about 5cm by 14cm.

I used the blocks above on both paper and fabric using different coloured lumiere paints to create backgrounds for later.
2.2
2.2 from top left clockwise:
large plaited braid on black hessian, small braid stitch on cotton, large plaited braid stitch on cotton, small plaited on cotton.

2.3

2.3 I practised making some braids and knotted cords using felt cords I'd made previously.
The samples in the photo show the following: chain sinnet (or monkey chain), a single braid, a 4-stranded plaited braid, snake cord, square knotted braid, a 4-stranded striped braid, a chinese knot, and a 6-stranded chevron braid.
I owned a few books on celtic and chinese knots already for source material but found a few more on the web eg www.animatedknots.com and www.charles.hamel.free.fr/knots-and-cordages

As a bit of an aside, the snake cord is one that I do quite often in miniature for loops and closures on bags.

 I didn't include the Chinese ball knot in these samples as I felt it was too 3-dimensional for strapwork inclusion but it's one knot I use a lot - for tidying up the end of cords on shoulder bags more attractively than an ordinary overhand knot and a bit different from a bead.

It's amazing how many people notice it and ask how it's done.


Tuesday, December 20, 2011

Carols in the Domain


Saturday night we risked the chance of rain to go into Sydney for the annual Carols in the Domain, held in the open air out on the Domain parkland in the centre of Sydney.
The rain stayed off and it turned into a lovely evening.  There were thousands in the crowd as usual and we'd arrived with only 30mins to go before televising started so it was a bit unlikely we'd find anywhere to sit.
But our luck was in and a family with very tired crying toddlers were vacating their space as we passed so we descended with Esky and rug in lightening speed.

It's a lovely night just for the spectacle of thousands sitting in the dark all with candles, singing carols - it sets you up in the right mood for Christmas.


Good wishes to all my fellow bloggers and distant stitchers whether you are baking in sunshine or freezing in the snow!
Merry Christmas!

Friday, December 16, 2011

Tudor Strapwork

Finally got round to presenting my research on strapwork designs in Tudor embroidery.  I realised that I'd started collecting bits and pieces a year ago, oops, but better late than never.  This is one piece of reearch I wish I had been in the UK to study but books and photos from previous trips had to suffice, along with the internet of course.

I've presented the work on 3 A3 boards with a short A4 text.
The "Shakespearean" script on the boards I downloaded from a website so hope it's readable.


The designs have been replicated using felt cords I made and leather cording I had already as I felt they reflected the materials of the time.


The third board has stitch examples sewn in gold thread on 32count linen, and some rubbings taken from the printing blocks prepared for chapter 2.


Sunday, November 27, 2011

Fun at the Fair

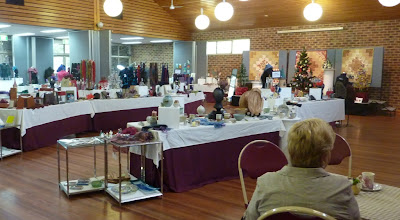
Friday evening found me at the Barker College, Hornsby taking part in their Christmas Fair.  It was held this year under cover in their brand new multipurpose hall, fortunately as it rained all afternoon and evening.  Given the terrible weather, the customer turnout was not bad and there were certainly lots of trading stalls to tempt them. 
My daughter Lorna came along to help and proved very good at marketing my wares, far better than self-deprecating me!


I thought we were going to be entertained with cheesy piped christmas music all evening, but the school string and jazz ensembles appeared instead which made a lovely change as they were so good.

A lot of friends came by but I also got a bit of interest from "new people" who appreciated the fact that everything was handmade so all in all it was a good night.

Wednesday, November 23, 2011

The flying birdhouses....


Many thanks to all of you who came along to Thornleigh Community Centre at the weekend for the NSCG Boutique Christmas Sale.  I recognised so many people and did appreciate your support of us and of Dial-a-Mum charity.


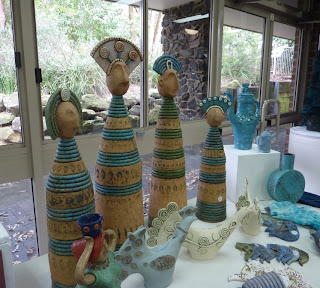
 On of the Group's new members since the last exhibition, Ruth Fugar, a ceramacist from Dural, was very popular and rightly so.  Her birdhouses practically flew out the door on Friday.


I resisted from my usual amount of purchasing during the weekend, but I did treat myself to this beautiful necklace by Rachelle Juter.  It's a good thing my husband never reads my blogs.


I had a few new additions to my bags and scarves such as the silk based clutch below


Next up is the Barker Christmas Fair on Friday 25 November 3-7pm at Barker College, Hornsby, where I'll have a stand full of Christmas goodies.  Love to see you there.

Thursday, November 17, 2011

North Shore Craft Group

I do hope that if you are in the Sydney area you will be able to drop in to the NSCG Boutique Christmas Sale 2011 at Thornleigh Community Centre this weekend.
As well as lovely goodies from more than 35 members including me on display for sale, there will be demonstrations each day eg.weaving, and Penel will be making her lampwork beads, not to mention yummy refreshments.


Hope to see you there!

Saturday, November 12, 2011

Sculpture by the Sea

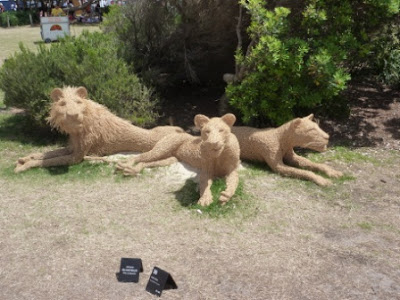
It's that time of year again in Sydney!  My daughter and I went along yesterday morning to enjoy the walk from Tamarara Beach to Bondi along the cliff top to see this year's entries in Sculpture by the Sea.  We went quite early but by lunchtime it was chocca and pretty hot.  Guess who forgot the suntan lotion on her feet!

I didn't think it had the wow factor of some past years but still pretty good - here are a few of my favourites:

 mosaic glass and mirrored tiles


 detail of above

 There was a matching giant plug hole on the beach

 This was completely woven in straw and reeds.

Wednesday, November 9, 2011

Still life with glass

We had a social day at ATASDA today in Epping with a theme of sketching still life so it seemed a good opportunity to follow a little of Sian's suggestions in her drawing challenge for November.

I took along a collection of glasses purposefully to challenge myself a bit as I usually avoid glass and its reflections.


I coloured the A5 pages with diluted Brusho paints that the group had available, and some of my own inks, so that I could use white Inktense pencils and white gel pen to draw in some of the light reflections on the glass.


From one of the sketches with 3 glasses I had a go at drawing the same arrangement in one continuous line. 


I can really see how some stencils or stamps of this shape (or sections of it) could give interesting designs.  More to follow hopefully....

Saturday, October 15, 2011

Mixed media fun

Last week saw me at Cloth Arts Textile Forum in Hunters Hill, Sydney during the school holidays at a week long workshop with Sherrill Khan from the USA.  We worked on both paper and fabric playing with every form of painting medium I think I owned plus a few I'd never tried, so as you can imagine we never stopped all week.
The stamina Sherrill had amazed me as she did demo after demo for us, so generous with her expertise and knowledge.


I don't regard myself as a 'stamping' person generally, only doing the odd monoprint and rubbing, but I fell in love with her stamp mats and found sufficient US dollars lurking at home to buy some from her - can't wait for them to arrive Sherrill!

A lot of the techniques could be found in her newest book "Creative Media" photographed using a lot of American products but Sherrill demonstrated using largely Australian products for our benefit which made it a whole lot more useful.....and cheaper.

Here she is rubbing over her own stamping mats with inktense pencils.
I loved the 3D effect she got with her selection of lights and dark pencils - it almost looks folded in places.


These are some of the sample pieces she brought along and others she did at the workshop for us:

using masking tape as resist

using a glue stick as a resist

I did quite a bit on fabric during the week but put my paper based pieces into the little exhibition at the end.  I worked on heavy bristol board A4 sheets and created a little folding hinged book with my samples, embellished with some felt balls.  The paints here are principally Golden flow acrylics layered which are by far my favourite.  The pigments are so strong and you get a lovely sheen to the surface without trying.


 A couple of closeups of the pages -


 I created little tags with some of the sampled techniques for reference.  The couple on the right are melted wax crayon designs - definitely use that method again.

Sunday, August 28, 2011

Sketchbook - day 30's stitching

It turned out to be a lovely day yesterday after all the rain we've been having, so I thought I'd take my sketchbook outside and finish the stitching / painting excercise out there.  Sat down and realised the table was filthy so decided I'd just clean that before I got started.  Then...with the bucket of hot soapy water there just thought I'd wipe over the large pots....and sweep up the decking....oh and the pool needed skimming of leaves....
An hour and a half later I finally got the paints out.......but I like to think it benefitted from the tidy surroundings!


Picked some of the large palms in our garden for the subject of this.

I used crochet perle cotton to sew over the leaves in buttonhole stitch.  I didn't appreciate how dark these stitches would become once they'dd sucked up the ink, so not a very accurate painting, but I loved the wet print achieved on the facing page.

And this was the result on the following pages - back of stitches on the left and their print on the right.

Tuesday, August 16, 2011

Sketchbook - monoprinting in perspective!

Initial sketches of my sewing chair and reels, ink bottles-


Then went over the lines on the right page above, over a printing ink plate under the page to give the following couple of images:

The second one used the remains of the ink left on the plate after the first was printed, and I think gives a clearer image of the cylinder shapes.  I used fabric printing ink as it was at hand and the right consistency.

 I printed a couple the same in turquoise and in green with scraps of handmade paper as resists, then swopped over the paper scraps in the prints.  The one above shows the turq monoprint (ink a bit thick) with the green printed scrap in place.


Here the bottle was printed in green then the glasses were overprinted in yellow and red.  The imprint is shown on the right. 
This got quite addictive - must try some on other paper textures after seeing Sian's prints on Tissutex.