Pages

Friday, May 28, 2010

Bag making in Brisbane

I had a lovely weekend just past in Brisbane tutoring "Framing the Fabric" otherwise known as 'bag making with frames' for the ATASDA Queensland Branch.

I had 12 ladies who were all willing to be flogged mercilously for 2 days and produced the most wonderful bags and purses in that time.

I think they all went home for a rest on Sunday but I hope they all enjoyed it as much as me.

Here's Mel in a 'retro phase' with amazing psychodelic material (before):


(and after): What are those handles like?


Svenja, whose wearable art is stunning, of course matched her purse with .....


And fortunately I didn't get stopped at the airport on the way back this time with my bags of magnets!

Friday, May 14, 2010

Orange felting

Might seem a strange title but Orange is a town past the Blue Mountains in NSW where an annual Textile Forum is held in the easter school holidays for a week. This year I attended, spending a wonderful week felting with Catherine O'Leary a great felter from Melbourne. She specialises in creating the most beautiful garments from nunofelting tissue silk on to merino tops and batts. She had a few on display which we oggled over.


She prints a lot of her own line drawings on to silk which are nuno felted in.
I've done quite a bit of nunofelting over the last few years in Australia but never creating such smooth and flat fabric. Any time before I've exploited the shrinkage of the wool and the resulting rouching and gathering you get in the silk on top. It was wonderful to work with fabric which was felting so carefully and slowly that there was barely any shrinkage involved and the silk patterns just merged into the wool.

My efforts were not as refined lets say but I attempted a tunic in the week which I tried to design incorporating all the techniques she demonstrated to add pattern and texture.

Here I am laying out the pieces:

This is the wetting down stage under a layer of plastic:

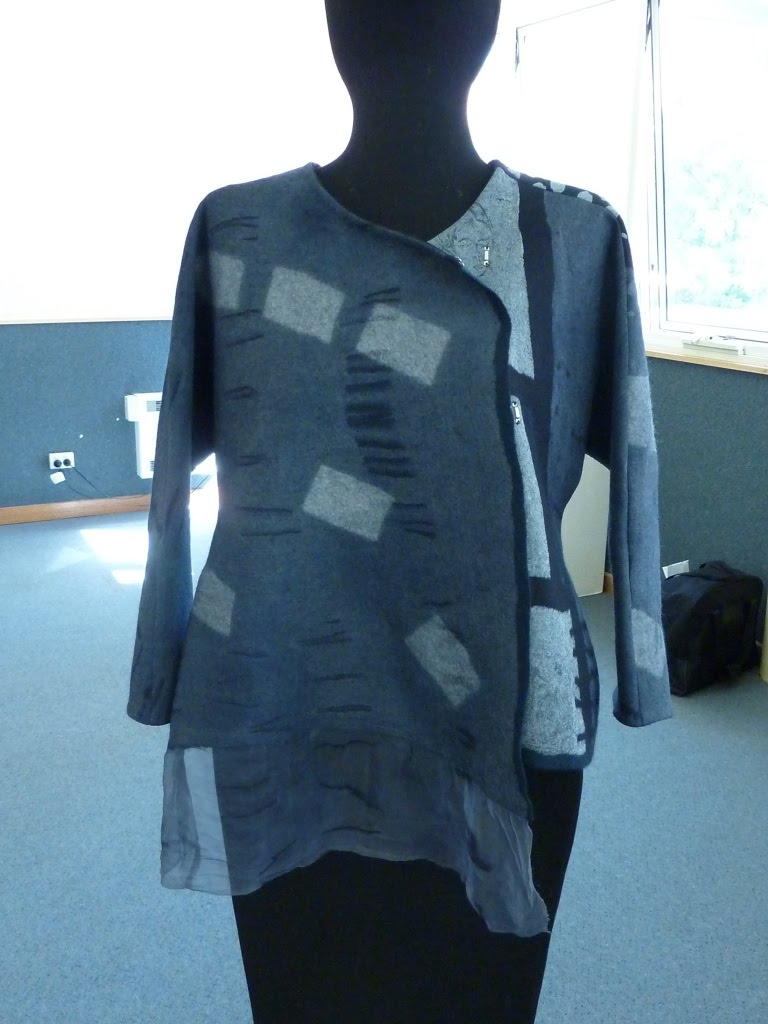
and many hours later the finished tunic (front and back). Spot my recurring motif from my research, and my dress!

The motifs were inlaid, or appeared through cutaways or felted on top, but in the end you couldn't really tell which method had been used as it was pretty smooth.

The weaving of pre felted strips was my favourite:

One lady decided to make a whole bag front with weavings.


The finished display of the class's work was quite amazing for only a week's work. The photo below shows only a small part.

The patterned green rectangle was also mine which will be a cover for my A3 sketchbook/folder in the diploma - finally I'm decorating it! At this stage I hadn't done any embroidery on top - what am I saying I still haven't done any now......but the intention is there you understand!


I loved felting in the "sushi roll slices":

My arms and shoulders were still aching for days afterwards!

Friday, May 7, 2010

Functional 3-D piece

Many moons ago I put up some of my ideas for the embroidered piece at the end of Module 1 so I thought I'd better show how that was progressing. Since I first worked on it I'm afraid I got seduced by Module 2 and the piece kind of migrated towards the UFO pile. However 5 sales and 2 workshops later I thought I'd better get back to some real work.

I had the idea of taking the patterns created from monoprints and creating a garment, a dress concentrating on a lace effect of overlaying shapes.


Taking into account some of Sian's comments I attempted to create a visual impression of layers but making only one piece of embroidered material. I tried to keep the overall fabric light and translucent so the embroidered elements could show through.
I liked the coral / pink and olive green combination so I started by dyeing light muslin a dusky pink/coral colour (excuse the bad photo). I machined random pintucks in the fabric to create a bit of texture and replicate the original monoprint background markings.

photo 1

I then added dyed pieces of scrim and lengths of overlocked threads in various tones.

photo 2.

My olive green chiffon was overlaid on this, then covered with water-soluble plastic, ready for sewing my lacework design. I decided to change the early design to one involving one of my shapes selected in chapter 12. The lacework pattern below was created, drawn onto the plastic and free machined using cotton threads and a hoop.
photo 3.
Once the water soluble was removed, lacework was created by soldering iron.

photo 4
From 2 large pieces this fabric I was able to make this dress:

photo 5.

The bottom of the dress is shown below in detail, where I allowed the lacework to fall below the line of the muslin fabric.
photo 6.
The back of the dress is shown below. The bodice was made from the same dyed muslin with bias pleating of chiffon on top.

photo 7.

The dress is not complete yet - the bodice (below) still has a raw upper edge and the embellishment forming the one shoulder strap is only pinned here. But essentially I am planning to use individual lace motifs (smaller version of the lacework shape used in the skirt) to sweep over the shoulder, across the bodice (following the chiffon pleats) and a little down the opposite side. I've made fabric tendrils/vines to follow this shape and link the motifs.

photo 8.

Saturday, November 14, 2009

Sculpture by the sea 2009

Last weekend I went to see "Sculpture by the Sea" the annual sculpture exhibition and competition held on the headland between Bondi Beach and Tamarama Beach in Sydney. The wind was fairly strong so we could watch many intrepid surfers tackling the waves at Bondi as we walked along the coastline.
This is Bondi (above) and Tamarama (below)


This exhibit reminded me of your work, Jane.


I did love these fat little bronze men mirrored below the plinths.


This one was made out of cut sections of plastic pipe arranged in a honeycomb pattern. It was in the path of the tide so was gradually being eroded away over the 2 weeks of the exhibition.


Horses seemed to be a popular inspiration this year - this one beautifully woven with amazing detail.

You can see more of the detail below.


This rather buxom beauty was made out of old car parts, particularly the door frames. You can tell the scale from my son beside it.

You couldn't escape the natural sculpture of the rocks themselves, but this last exhibit reminded me so much of summer school and Janet Edmonds' repetitive shapes. These knotted strands were about 5 or 6 feet in length and appeared to be made out of hundreds of discs of resin, about the size of your hand. They matched the stone colourings and hung swaying in the breeze - definitely my favourite for the day.

Friday, September 25, 2009

Red sky in the morning.....

As some of you might have read in your papers, we woke up on Wednesday to this in Sydney. Well, not exactly this view 'cos I live overlooking the bush, but just as orange a sight. I've never seen anything like it, very spooky indeed!

My camera was without battery of course so I couldn't get my own photos but it changed from this red to orange to yellow as the day went on. My son, never slow to spot an opportunity, chose to tell me that some schools were closed for the day but apart from endless red dust still everywhere, it wasn't too bad.
However, I decided to stay indoors for the day (what a great excuse) and get on with some sewing. After comments from Sian I've been playing around with my lacework trying to see how I can create a complete piece of "fabric" out of the shapes to use in my dress, or at least how big a piece is manageable. I got somewhat sidetracked of course and played intially with a scarf length piece of chiffon which evolved into this:


and then this clutch bag where the chiffon was directly sewn onto the black silk then remaining chiffon soldered out. I did some further outlines after to give more interest.


I did another scarf in purple using connecting swirls.

Now to get back to the patterns I should be working on..